8 Common problems when recording audio and how to fix them
Recording audio for your videos may not be as simple as it sounds.
The first recommendation is to use an external microphone, but even so, some care is needed to get a good result. See the most common mistakes that can happen while recording and learn how to fix them.
Recording Audio: Common Issues and How to Avoid Them
If you produce video content for your audience, as in the case of classes for online courses, it’s critical to ensure the quality of your audio.
No one will be interested in your material if they cannot clearly understand what you are saying.
Therefore, even if you are recording videos at home, avoid using the microphones built into your computer or smartphone, and invest as much as you can in external equipment to record audio.
– How to set up a studio to record videos at home
A good microphone will certainly improve the quality of your recording a lot, but, still, it doesn’t prevent common mistakes from happening and hinder the final result. So keep an eye out for the most common problems listed below and learn how to avoid them.
1. The sound is too bassy
This is due to the proximity effect, that is, as the microphone approaches a sound source, the low frequencies picked up by the device increase. What to do in this case? Simple: move the microphone away from your mouth.
As the distance between the microphone and the sound source increases, you should notice that the bass decreases and the sound becomes more balanced. But don’t go too far, find a point of balance, or you’ll have other problems. We suggest keeping about 6-12 inches away from the microphone.
It’s also important to remember to keep a constant distance. Moving closer and further away from the microphone can cause fluctuations in the volume of your recordings.
2. There is a lot of room sound
When it comes to reducing ambient sound, the simplest solution is to move closer to the microphone. This increases the volume of the voice while keeping room noise at the same level, balancing the two so you get more of the sound you want and less of the unwanted.
It’s also worth considering what kind of microphone you’re using. To minimize ambient sound, it’s best to use a cardioid microphone that records in only one direction. Omnidirectional and 8-shaped microphones record in multiple directions and thus pick up more noise from the surrounding space.
Another solution is to try to “protect” the environment, dampening noise. You can invest in sound absorbers, or try making your own with some mattresses and blankets hanging around.
3. There is a lot of bassy rumbles in your audio
Unwanted vibrations are a common problem in home recordings. If you are using a microphone stand, make sure the lowest vertical part is not touching the floor.
Some microphones have a built-in filter option – this removes those annoying sub-frequencies without impairing the clarity of the voice.
If your microphone doesn’t have a built-in filter, it might be worth investing in a shock mount system. However, be aware that they will not be able to avoid higher vibrations.
The best way to stop noise is to ensure that the microphone does not encounter any vibrations, ie, controlling the environment around you.
4. Your breath sounds too loud
It happens! A very common problem when recording audio, breathing, the one we don’t pay attention to, can ruin a perfectly good narration.
Unfortunately, there is no quick fix to ban breath sounds from your recordings. All we can advise is to work on your microphone control and try to be aware of it, training to get the best result.
– 7 tips for speaking well on video
5. Your recordings sound distorted
When you’re new to the business of recording audio, it can be tempting to turn all the settings to their maximum. However, high doesn’t necessarily mean good. If the audio meter or any other input device is turning red, it means your recording is clipped, which can create unwanted distortion.
To avoid this, lower the gain of the microphone or audio interface. If this is too difficult, try stepping a little bit away from the microphone.
6. Plosives everywhere
Plosives are a problem that pretty much everyone faces. This unwanted noise happens because the ‘p’ and ‘b’ sounds send an air current towards the microphone, creating a great bass response, making it distorted.
Did you not understand? Place your palm parallel to your mouth and say “papaya”. You should feel two gusts of air hit your palm as you say the letter P. If you replaced your hand with a microphone and recorded the sound, two peaks would appear in an audio editor.
Fortunately, there is a quick and inexpensive solution for this. Pop filters are mesh screens that can be mounted on a desk or microphone stand in a matter of seconds and work exactly as the name implies. The filter screen is impacted by the air that escapes from the mouth, so the blast is barely audible when it hits the microphone.
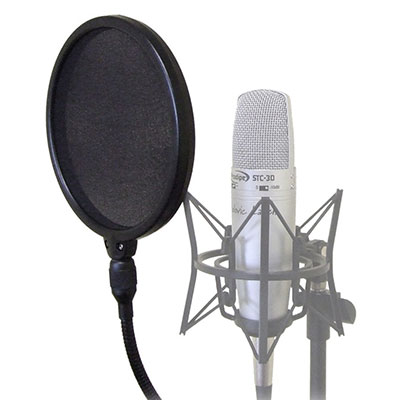
It’s also worth noting that omnidirectional microphones are less susceptible to plosives.
– Basic video editing techniques
7. Harsh squealing
These occur due to call sibilance, which is an unpleasant harshness that can occur during the pronunciation of consonant syllables (like S, T and Z). These syllables are concentrated in the upper middle frequency (between 5kHz and 8kHz) and are caused by disproportionate audio dynamics.
To avoid wheezing, try to stand about 10 to 35 cm away from the microphone, and tilt the device down about 10 degrees. Also, if you have a very clear voice, it might be worth investing in a darker microphone, meaning one with less pronounced upper midrange frequencies.
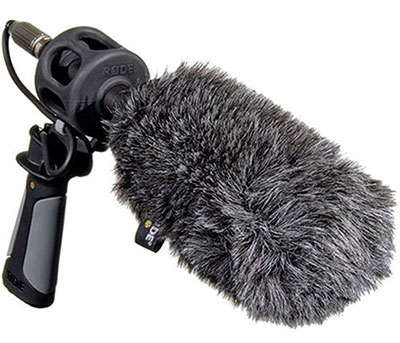
8. Wind noise
When recording audio outdoors, you will likely hear some wind noise. This is similar to a plosive, a gust of wind hitting your microphone’s diaphragm and creating a bass booming response.
The best way to avoid this is to invest in a ‘dead cat’, those fuzzy windshields with an acoustic foam interior that literally look like a cat’s body. This cover prevents the wind from reaching your microphone, keeping the audio intact.
Noise from the moving microphone cable is another problem you may face. Depending on the type of recording you are making, there are a few solutions. If you are conducting an interview with a lavalier microphone, thread the string under your shirt and use some duct tape to keep it in place.
9. BONUS TIP
Anyone recording audio in a home studio usually forgets to be careful with the wires, and ends up kicking them accidentally.
To avoid damage to your equipment and noise from slamming cables into your recording, take duct tape and run over excess cables across the floor. This way, both the quality of your recording and your equipment will be guaranteed.
Also, whether you record indoors or outdoors, a good shockmount is a must to reduce micro-vibration. If you’re walking and recording, it becomes critical for a shotgun microphone. The same goes if you’re in the studio and you end up gesticulating a lot and hitting the microphone.
Remember: the anti-shock montage you don’t do now is the recording you redo later.
– Know how to record videos at home
Recording audio: general tips for a good result

As a general rule, standing about 6 inches away from the microphone will provide clean and balanced recordings, suitable for almost any situation.
The way you speak is also essential for a good result. You need your audience to clearly understand what you’re saying, so pacing and pronunciation are very important.
To accomplish this, rehearse your script a few times before recording audio, this will help you resolve any potential issues. Oftentimes, a script can be read well, but when you speak it out loud, you see the need to make changes.
– 7 Tips to Create a Video Script
Speaking into a microphone is physically more difficult than you might think. No, you won’t wake up the next day with sore limbs, but you can start to develop a sore throat and dry mouth very quickly. To avoid this, try doing some vocal warm-ups before starting. It also always helps to have a glass of water on hand for emergency sips.
Although proper recording technique is often learned through trial and error, this guide should help you avoid the most common problems.
Video ready, it’s time to transfer your class to an eLearning platform and start selling your courses.
Elearning Platform (LMS), Coursify.me has all the necessary features for you to integrate and import content from channels such as Vimeo and YouTube.
– Whats is a Learning Management System
Instructors can embed their hosted videos on any of these platforms on their page on Coursify.me, making their lessons even better.
Visit our website and enjoy all the features our platform offers to create and sell quality online courses.